VPN for beginners
A layperson’s experience in signing up for a Virtual Private Network (VPN) in Australia. It isn’t as tricky as it seems!
There has been much discussion in the media in recent times about privacy concerns following the passing of the Australian Government’s unpopular mandatory data retention legislation.
Whilst that doesn’t concern me per se (I don’t engage in illegal activities online), I do have significant concerns about privacy and the rights that other third parties (eg: movie studios) may have to my data. The recent Dallas Buyers’ Club incident is alarming, to say the least.
Virtual Private Networks (VPNs) have suddenly become very popular as a result of certain court decisions and an increasing number of Australians are seeking to protect their privacy via a VPN. This even includes the Minister for Communications, Malcolm Turnbull, who recently joked at a conference how VPNs can be used to bypass the government’s own mandatory data collection systems:
Your web surfing history is a matter for you, you’ve all got VPNs anyway – all of you appear to be somewhere in Iowa when you go online, I know that. So the utility… um, anyway I won’t go on!
Malcolm Turnbull, 10 August 2014
A VPN is used to conceal one’s activities online by masking their IP address and encrypting all data transmitted. This has a number of advantages:
- Data cannot be read by third parties. (Your ISP will see that you have made a connection to a VPN but that is all).
- You can surf the net using IP addresses from different countries, thus bypassing geoblocks (a move that both the Minister for Communications and the High Court say is not illegal under the Copyright Act 1968).
- You will be accessing web content with a shared IP and so your activities cannot be personally tracked.
- You provide yourself with an additional level of protection against hackers and online crooks.
For a more detailed explanation of how VPNs work, more information is available on Gizmodo.
There are pros and cons to the services that different VPN providers offer, so the selection of company will depend on these considerations.
How I chose my provider
This was the most difficult part. There are so many to choose from.
I don’t use bit torrents or engage in gaming so absolute speed wasn’t the first criterion. That said, speed was still important (especially since I am on mobile broadband) so it was a consideration. I wanted to choose a company that kept as few records as possible (preferably none) because privacy was a big concern. It is for this reason that I could not choose an Australian-based provider. I wanted a big company with a decent reputation and I needed to be able to log in with multiple devices at once. Finally, I wanted software that made installation and connection easy.
After some time, my search was narrowed down to three companies: PureVPN, ExpressVPN and IPVanish.
In order to conduct research, I looked at each company’s website to check their policies. I also read reviews from Choice, Lifehacker, PC Mag Australia, and the Whirlpool forum amongst others. There was a lot of information to wade through.
PureVPN initially seemed good but I wasn’t happy with some of the reviews. ExpressVPN looked good, because it is based in the British Virgin Islands and so is out of reach from the European Union or the United States. Unfortunately ExpressVPN only permitted one device to be connected at a time and my household has four. IPVanish had a good product offering which permitted multiple devices to be connected, but is based in the United States.
In the end, I chose IPVanish as the overall product appeared to suit my purposes. I was even able to pick up a 25% discount through a third-party website.
Getting it set-up
This was the easy part.
After paying with my credit card (other options are available) and activating my account through some email verification, I downloaded and installed the software. Software is available for multiple platforms from the IPVanish website.
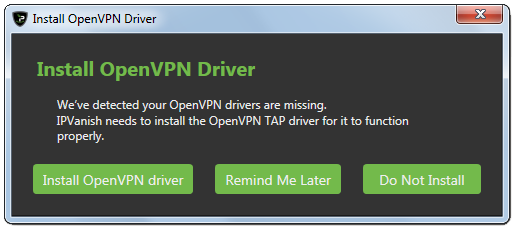
The software for Windows 7 requires Windows Installer 3.1, Microsoft .NET Framework 4.0 Client Profile (including the KB2468871 update) and the OpenVPN Tap Driver. Thankfully the IPVanish software will check these and install them for you if they are missing. You will need administrator rights for this to proceed.
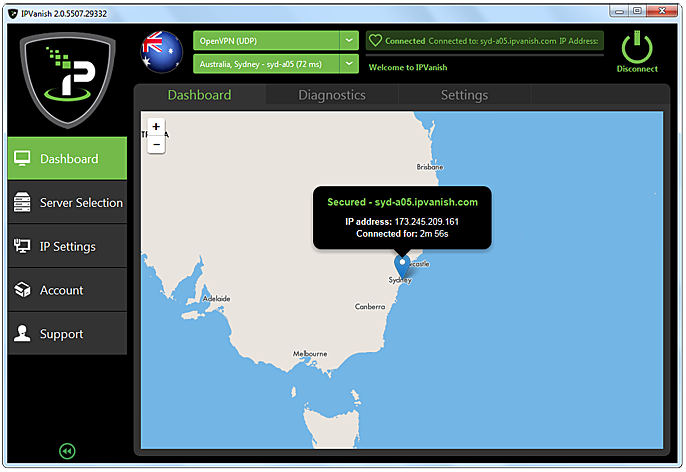
Once installed, the software recommended an Australian server based on speed. Connection took approximately 6 seconds on my iiNet 4G mobile broadband.
Getting it started every time
IPVanish will not automatically start when you restart your machine. If you want to change this, follow these instructions:
- Open IP Vanish software.
- Go to Dashboard in the left menu, then “Settings” up the top.
- Under “VPN”, check “Auto Reconnect”.
- Under “Startup Options”, check “Connect to fastest server” (if this is what you want) then “Start when Windows starts”
Unfortunately the programme will want administrator permissions in order to function every time the computer starts. To overcome this, open the Control Panel in Windows, and go to ‘System and Security’ > ‘Administrative Tasks’ > ‘Schedule Tasks’ and then locate IPVanish under the “Task Scheduler Library”. Double-click and then check the “Run With Highest Privileges” button.
One final check
A great piece of advice I read online was to check for IP leaks via WebRTC. There’s a website especially dedicated for this: IPleak.net
Unfortunately Windows machines running the Firefox or Chrome browsers will reveal their true IP address via the WebRTC protocol, but this bug can be fixed. To check, go to IPleak.net and check the IP addresses shown. If, for instance, you’re connecting via a US server and an Australian IP is listed, then there’s a leak.
Firefox Fix
Here are the steps for fixing the problem in Firefox:
- Type about:config into the address bar.
- Click “I’ll be careful, I promise” button.
- Within search, find “media.peerconnection.enabled” and change the value to “false”
Chrome Fix
Chrome users can install the ScriptSafe extension, which is free.
Final comments
Having now installed the VPN, I have so far been satisfied with the service from IPVanish. Unfortunately all VPNs will slow speeds to a certain extent, but so far the speeds have been reasonable.
Setting up a VPN sounds horribly complicated and confusing, but it isn’t. That said, the conclusions that I drew about which provider to go with suited my own circumstances and may not suit yours, so it pays to do your own research.
I hope this article is helpful to the many Australians concerned about privacy and willing to explore their options to protect their online anonymity.
Comments
One response to “VPN for beginners”
Great article! I tried lots of VPNs when I was new to it. I found out about Ironsocketvpn and it never failed me.