Connect an RStudio project to Github
Use GitHub to back-up your R projects within RStudio and ensure you maintain version control.
If you are looking to use GitHub to back-up your RStudio projects, the following procedures will help you set this up on your Windows machine. A couple of assumptions are made:
- You have installed Git
- You have installed R
- You have installed RStudio
- You have a GitHub account (they’re free)
- You are using Windows 10 or Windows 11
Once these steps are complete, you can do the following:
- Check that RStudio can find Git (an important first step)
- Add a new RStudio project to GitHub
- Add an existing RStudio project to GitHub
- Back up regularly (good practice)
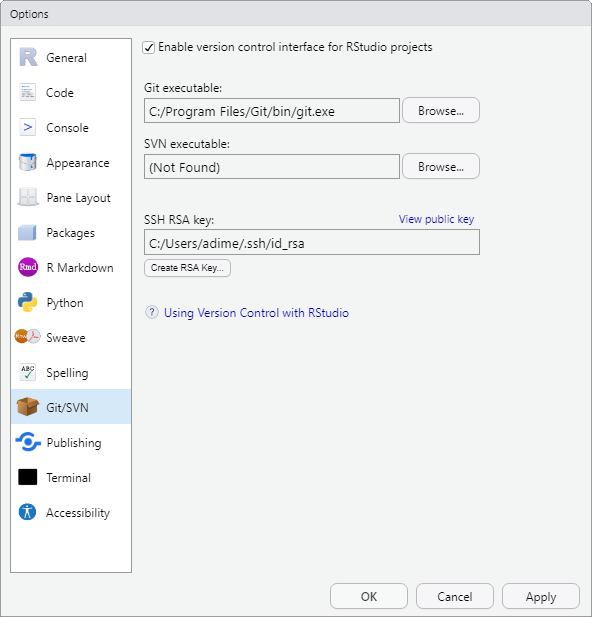
Check that RStudio can find Git
The first task is to ensure that Git can be located by RStudio on your machine. To do this, open RStudio and go to Tools > Global Options > Git/SVN.
Under “Git executable”, you should be able to see a path to Git. Typically, it will be in C:/Program Files/Git/bin/git.exe.
If Git is not in this location or you want to check where the Git executable path is, open the Command Prompt in Windows (Windows Key + R, then type cmd and press Enter) or Windows Terminal. Type where git to reveal the Git executable file path.

If it doesn’t match the dialogue box in RStudio, click on “Browse…” and navigate to your Git executable file. Once complete, press “OK”.
Add a new RStudio project to GitHub
If you want to start a new RStudio project (ie you haven’t yet created it) and want to have it backed-up on GitHub, complete the following steps:
Firstly, create a new repository on GitHub via the website. Click on “New” from the front page and then:
- Choose a repository name (I will call mine “R-NewProject”)
- Choose public or private for your visibility setting
- Tick “Add a README file”
- Click on “Create Repository”

You should have a new repository that looks something like this:
Next, open up RStudio and go to File > New Project… > Version Control

Click on the “Git” option.

Fill in the URL of the new GitHub repository that you just created in the “Repository URL” box. The “Project Directory Name” will auto-fill and I suggest that you leave it as it is. Click on “Open in New Session” and then click on “Create Project”.

A new project window will open up in RStudio containing your new project. You will notice that it will contain some files under the “Files” window including .gitignore, (your project name).Rproj and README.md. The last file was pulled-down from your GitHub repository.
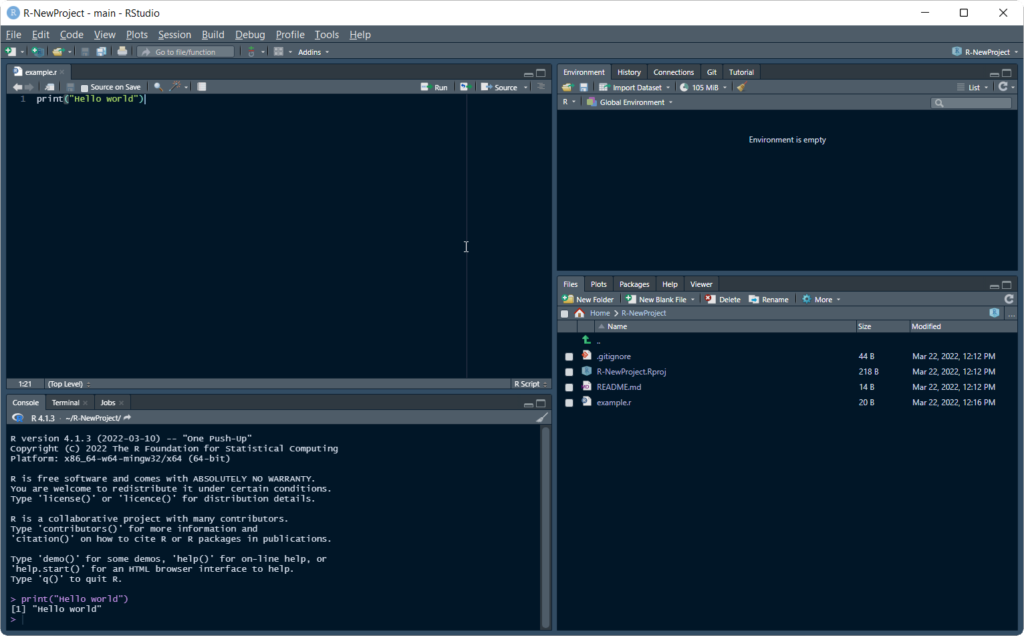
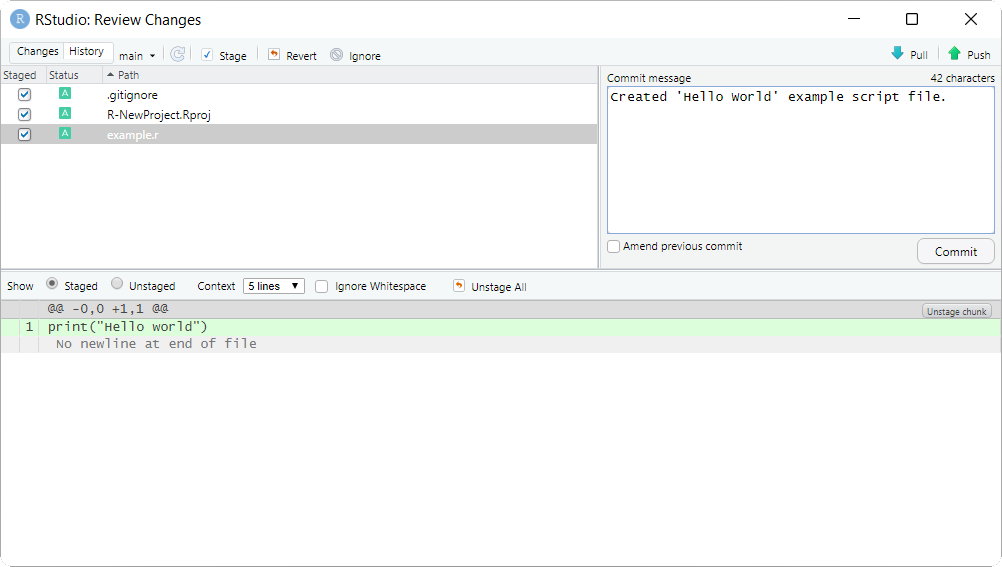
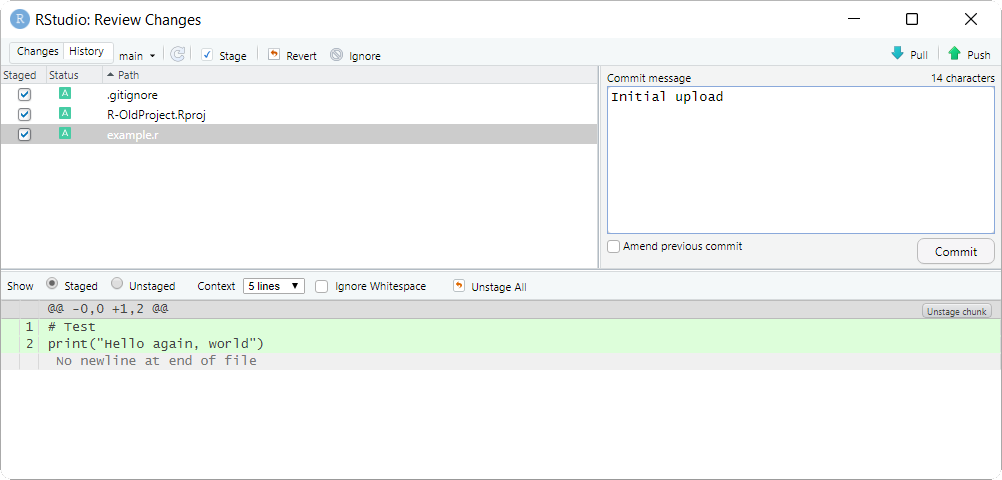
Next, to demonstrate how changes can be saved, I will create a new script file and add some code. This will then be saved locally. Following that, I will “push” my changes to GitHub so that my changes are also saved remotely. To do this, go to File > New File > R Script in RStudio.
Add the following code to the new file: print("Hello world"). Execute the code in your R script by pressing Ctrl and Enter. Next, go to File > Save and save your file as “example.r”. Your RStudio screen should look something like this:
This has saved your work to your computer, but not to GitHub. To save to GitHub, go to the “Git” tab in the upper right pane. Check the “Staged” box for any files whose existence or modifications you want to commit.
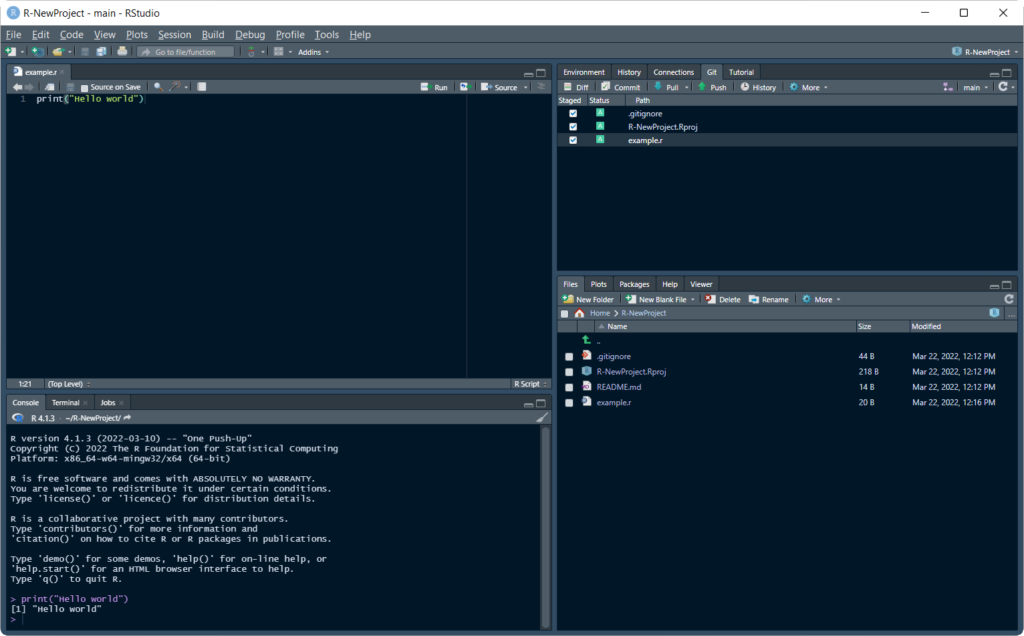
Click on “Commit” and a new dialogue box will open. Under “Commit Message”, add a brief (<25 words) but meaningful description of the changes that you have made.
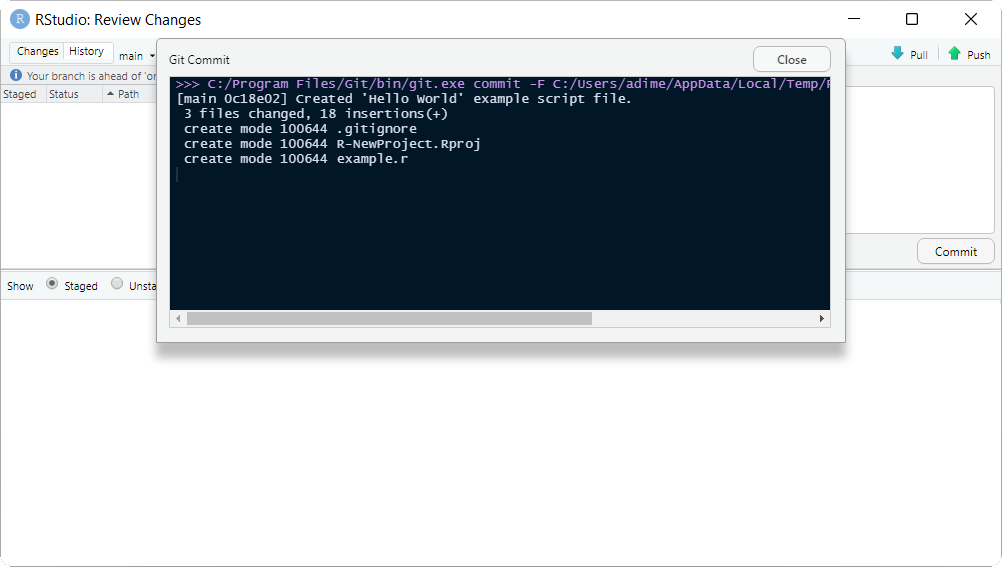
Click on “Commit”. A Git Commit dialogue box will be displayed showing that the files are committed to GitHub. You may close this second window by clicking “Close”.
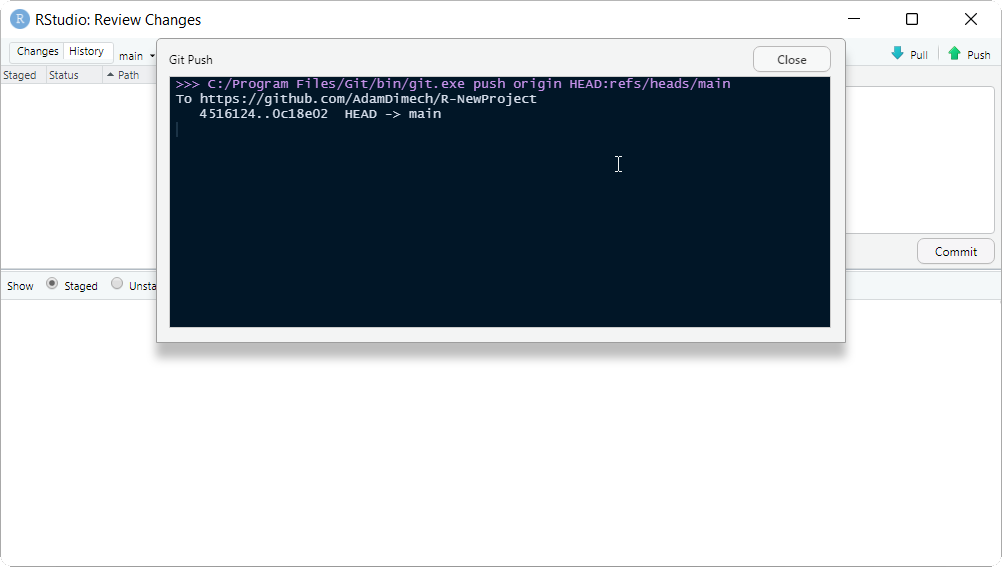
Complete the final step by pressing “Push”. This will upload the R files to GitHub. You will see a dialogue box come up confirming this in the form of a string followed by HEAD -> main.
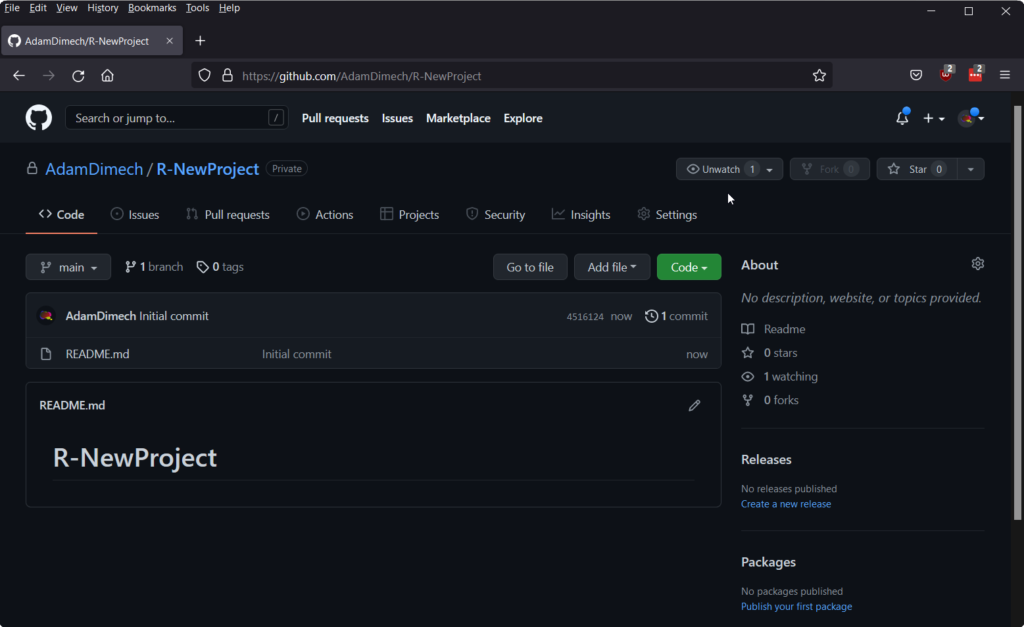
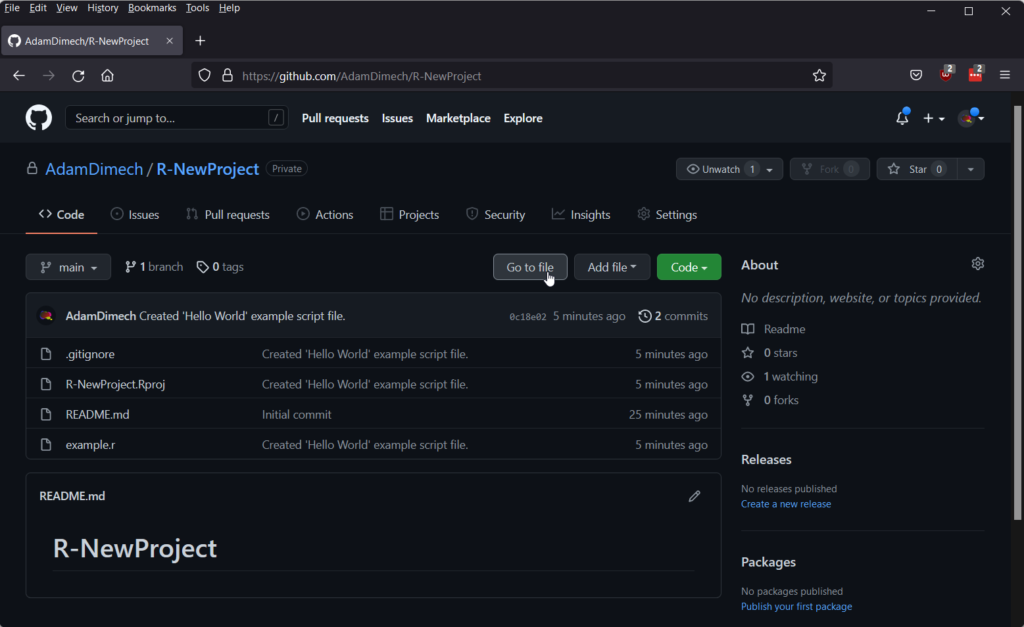
Now your R project has been backed-up on GitHub. To check this, go back to your browser and refresh your repository. You should see the files listed on your GitHub page:
Before you start any new work at the beginning of the day, you should “pull” your changes from GitHub. This will ensure that any changes made via the browser (or any collaborator) are brought down to your machine before you try and “push”. It’s a good habit to get into. To do this, click the “Pull” button under the “Git” tab in RStudio. Mostly, it will return a message stating “Already up to date” or will otherwise describe the changes made to your repository since you last worked on it.
Add an existing RStudio project to GitHub
If you have an existing project in RStudio and decide later that maintaining version control in GitHub would be a good idea, follow these steps.
Firstly, create a new repository on GitHub via the website. Click on “New” from the front page and then:
- Choose a repository name (I will call mine “R-OldProject” after my existing RStudio project of the same name)
- Choose public or private for your visibility setting
- Tick “Add a README file”
- Click on “Create Repository”
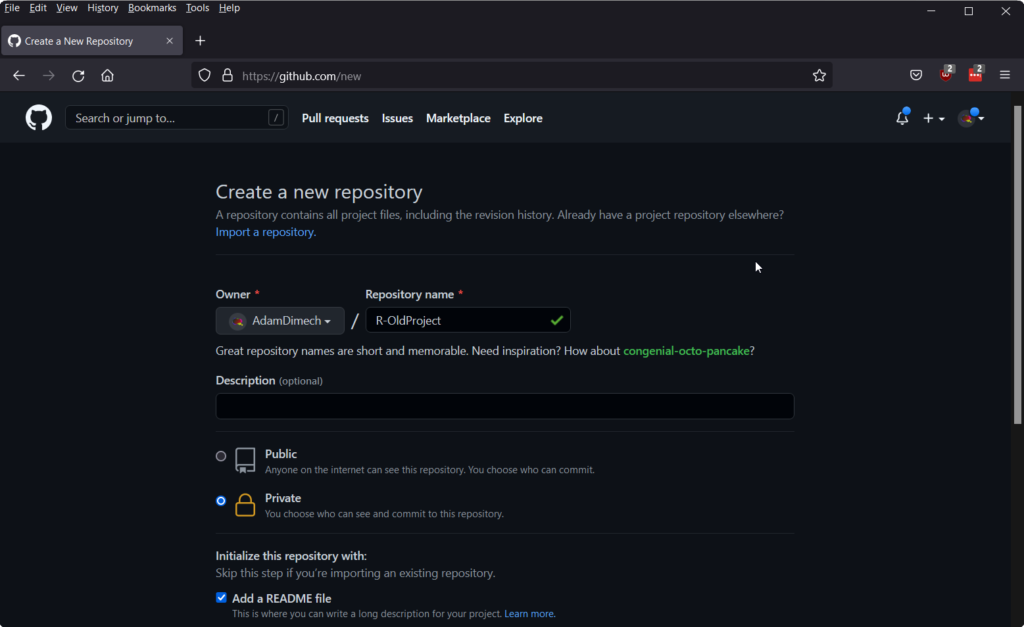
You should have a new repository that looks something like this:
Next, open your established project (mine is called R-OldProject) in RStudio. Go to Tools > Version Control > Project Setup. Click on “Git/SVN” and choose “Git” from the “Version Control System” drop-down box. If Git is not available as an option, check that RStudio can find Git.
You will be asked to restart RStudio. Do it.

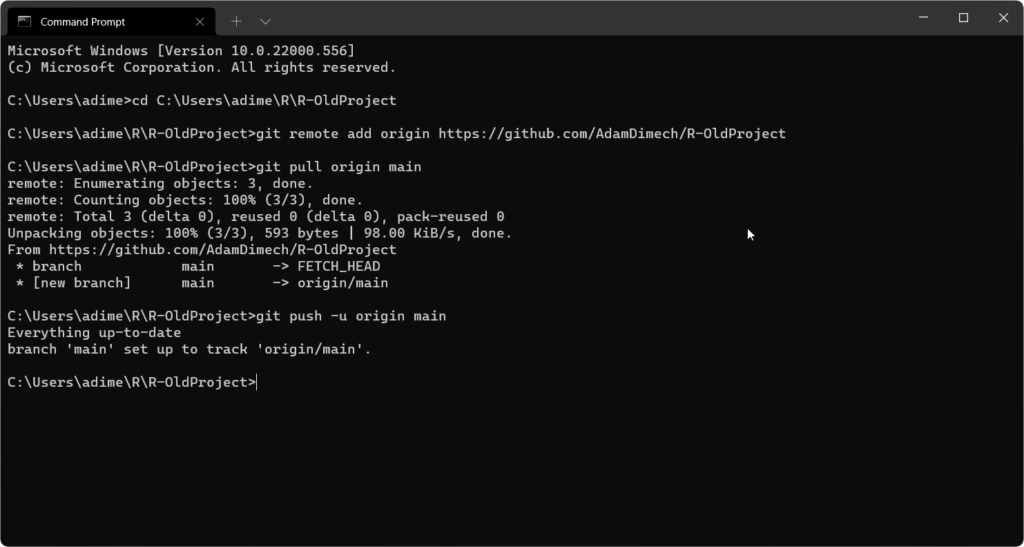
Next, open the Command Prompt (or Windows Terminal) and go to the folder that contains your existing R project. In my case, my R Project was stored at C:\Users\adime\R\R-OldProject, so the command for this would be cd C:\Users\adime\R\R-OldProject.
Next, enter the following commands, pressing enter between each line. (You will need to substitute the URL for your GitHub repository address after git remote add origin).
git remote add origin https://github.com/yourusername/yourrepo

git pull origin main

git push -u origin main
If you are using the Command Prompt in Windows Terminal, the output will look as follows (the old Windows Command Prompt will look similar):
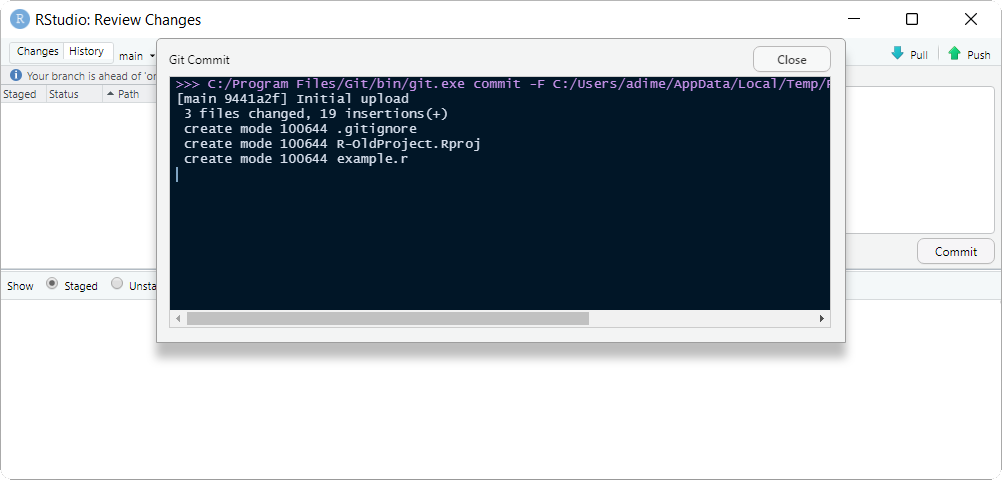
The next step is to return to RStudio and click on the “Git” tab. Click on “Commit” and a new dialogue box will open. Under “Commit Message”, add a brief (<25 words) but meaningful description of the changes that you have made.
Click on “Commit”. A Git Commit dialogue box will be displayed showing that the files are committed to GitHub. You may close this window by clicking on “Close”.
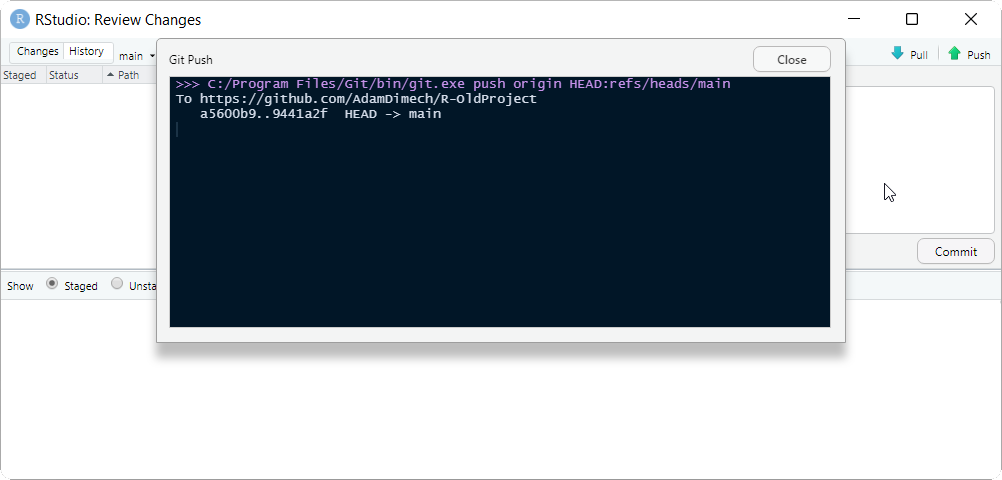
Complete the final step by pressing “Push”. This will upload the R files to GitHub. You will see a dialogue box come up confirming this in the form of a string followed by HEAD -> main.
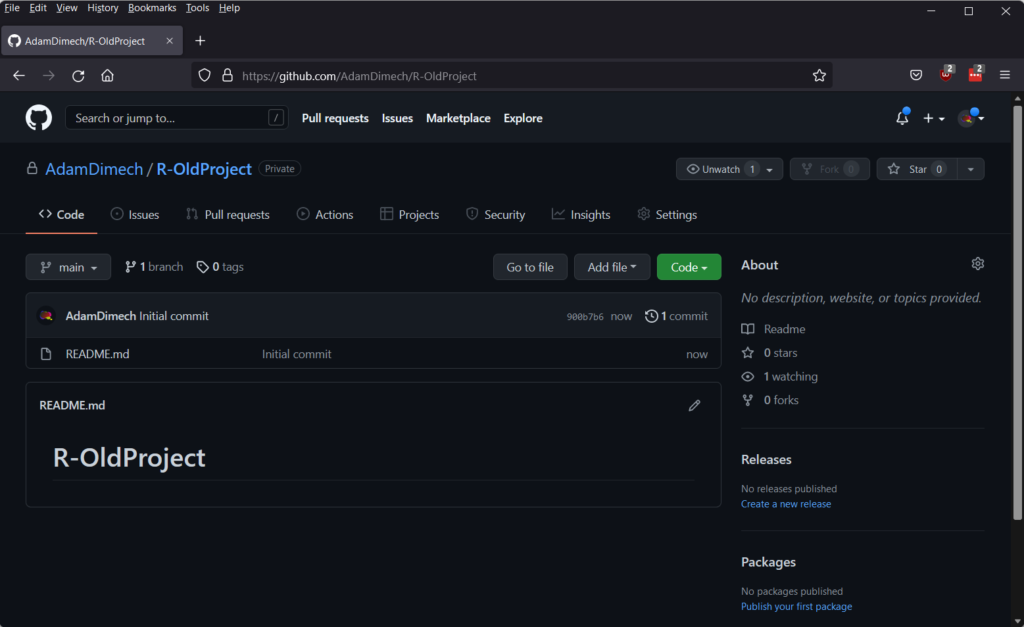
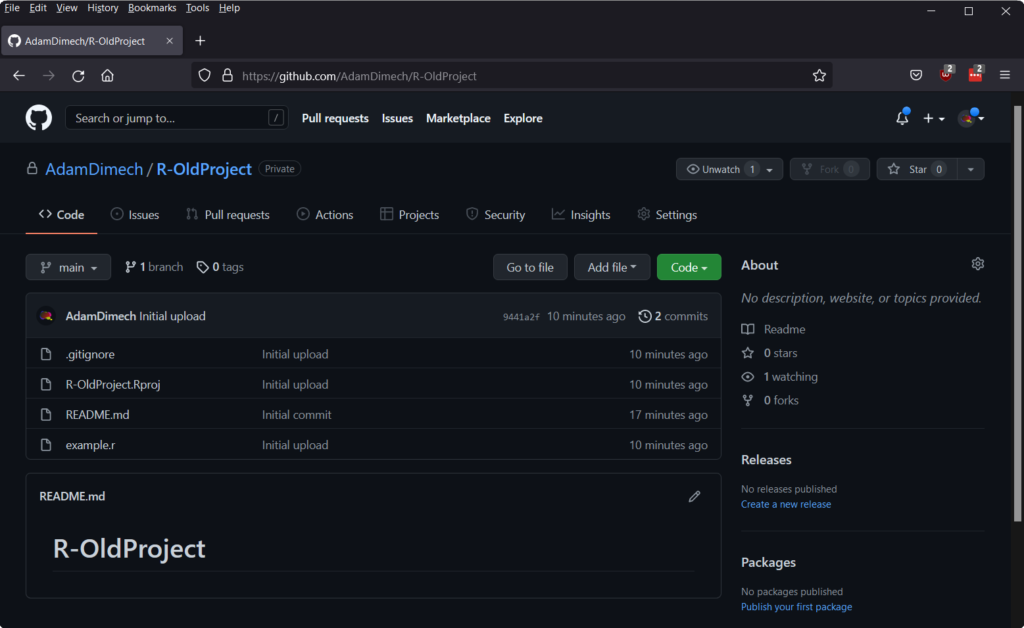
If you return to the GitHub website in your browser and refresh your page, you should see the changes that have been made.
Before you start any new work at the beginning of the day, you should “pull” your changes from GitHub. This will ensure that any changes made via the browser (or any collaborator) are brought down to your machine before you try and “push”. It’s a good habit to get into. To do this, click the “Pull” button under the “Git” tab in RStudio. Mostly, it will return a message stating “Already up to date” or will otherwise describe the changes made to your repository since you last worked on it.
Back Up Regularly
The real power of GitHub is version control. It not only saves your current files, but it maintains their history so that you can go back and recover your work should something terrible happen. This is particularly useful for elaborate or complicated projects.
Good practice is as follows:
- Whenever you open RStudio and launch your project, go to the “Git” tab and pull content from your repository before you commence any work.
- Save your work often and push to GitHub often too, particularly whenever you make a meaningful change to your code. Commit often and provide useful messages so you can keep track of what you are doing.
A Note about the Dark Theme in RStudio
You will notice that the screen captures from my version of RStudio utilise a dark theme. It’s called Night Owlish.
Versions
This blog post was written using:
- Microsoft Windows 11 (v. 10.0.22000.556)
- R (v. 4.1.3)
- RStudio (v. 2022.02.0+443)
- Git (v. 2.35.1.2)
- Windows Terminal (v. 1.12.10393.0)
Comments
No comments have yet been submitted. Be the first!