Product images on category pages in SwipeStripe
Instructions for modifying SwipeStripe Category so that image thumbnails will appear beside product descriptions on category pages within SilverStripe websites.
SwipeStripe is an open-source e-commerce module for the SilverStripe CMS. The SwipeStripe module relies on a number of SilverStripe modules as well as a couple of SwipeStripe plugins to extend its functionality. One key feature of SwipeStripe is the ability to place products from an e-store into various categories and have products from any one category displayed on a dynamically-generated category page.
In order to achieve this, the SwipeStripe Category plugin is required.
I recently came across a problem with SwipeStripe Category: the category pages display the name of the product and its price, but no picture. Thankfully SilverStripe coder Frank Mullinger kindly solved this puzzle for me with some code which I have adapted below.
Here is how you can enable images on your SwipeStripe Category pages using the same method:
Step 1: Upload product images
In order to display product images, you will need to upload an image for each product via the SwipeStripe Gallery plugin. Simply uploading images and including them within product descriptions is insufficient.
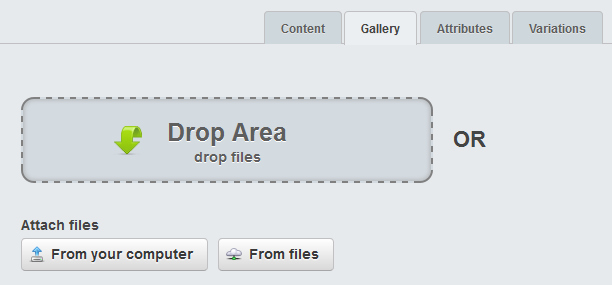
Log into Swipe Stripe, navigate to a product page and click on the ‘Gallery’ tab.

Click on the “Gallery” tab to upload product images in SwipeStripe.
Select an image that you have already uploaded, or include a new one for this product. Save the page (making sure that it is ‘published’) and then repeat for all products.
Unfortunately this process will insert a gallery into your product page. If you are like me and don’t want the gallery to be displayed on your product pages, open /swipestripe-gallery/templates/Includes/Products.ss and delete the following lines of code:
<ul id="slider">
		<% loop Product.OrderedImages %>
		<li>
			<a class="lightbox" data-fancybox-group="gallery" href="$Filename">
				$SetSize(250,250)
			</a>
		</li>
		<% end_loop %>
	</ul>

	<div class="thumbs">
		<% loop Product.OrderedImages %>
			 <a href="#slide-{$Pos}" id="slide-thumb-{$Pos}" class="slide-thumb">
				 $CroppedImage(50,50)
			 </a>
		<% end_loop %>
	</div>
Save and upload to your server.
Step 2: Modify the category product includes file
Using your text editor of preference, open /swipestripe-category/templates/Includes/Products.ss
The relevant part of the code should look something like this for each product.
<div class="product-brief">
<h5 class="product-brief-title">
<a href="$Link">$Title.XML</a>
</h5>

<p class="product-brief-price">
$Price.Nice
</p>
</div>
To enable images, make the following modification:
<div class="product-brief">
<h5 class="product-brief-title">
<a href="$Link">$Title.XML</a>
</h5>
<figure>$Images.First.SetWidth(200)</figure>

<p class="product-brief-price">
$Price.Nice
</p>
</div>
Save the file and upload to your server.
Step 3: Customise
The addition of $Images.First.SetWidth(200) tells SilverStripe to display the first image from the SwipeStripe Gallery for the product. The image will be displayed with a width of 200px regardless of picture orientation. As you’d expect, this can be customised easily.
For my application I wanted my image to be displayed first, followed by the product name and then the price. I wanted my image to be square, cropped from the centre with dimensions of 150px×150px. I also wanted users to be able to click on either the product name or product image and be taken the product page. Here is the code that I used:
<div class="product-brief">
<figure class="category-images"><a href="$Link">$Images.First.CroppedImage(150,150)</a></figure>
<h5 class="product-brief-title"><a href="$Link">$Title.XML</a></h5>
<p class="product-brief-price">$Price.Nice</p>
</div>
That’s it!
Your SilverStripe product category pages should now display thumbnails beside each product listed.
Comments
3 responses to “Product images on category pages in SwipeStripe”
Hey Adam, Thanks for writing this up, much appreciated!
As a suggestion I’d just add that you can copy the template files in the SwipeStripe gallery and category modules and paste them into the corresponding folder in your theme which saves you editing the templates in the modules directly – this makes it a bit easier to update the modules/manage them with composer etc.
Cheers!
Hi Frank,
That’s a great tip. I shall give that a go.
Thanks!
I tried to add the swipe-stripe gallery plugin and the gallery plugin.. But when I go to the gallery tab for the products, and when I select the image to upload or drag and drop nothing happens. I have the following error in console
Uncaught exception
TypeError: fileInput.data(…).replace is not a function
in onmatch on
Any Idea how can I fix that ??