Install Windows Subsystem for Linux in Windows 11
With the release of Windows 11 comes a vastly easier method for installing the Windows Subsystem for Linux (WSL) on your PC.
At last there is an easy way to run Linux beside Windows. It could be done in Windows 10 but was much more difficult than the Windows 11 experience. Here’s how it’s done:
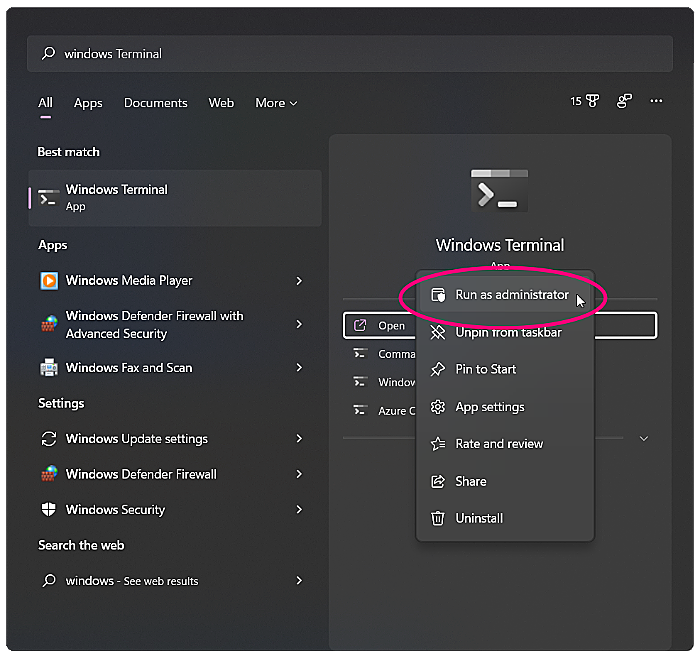
Firstly, open Windows Terminal (or PowerShell or CMD) as an administrator. To do this, click on the Start button then search for “Windows Terminal”. Right-click on the icon and choose “Run as administrator”.

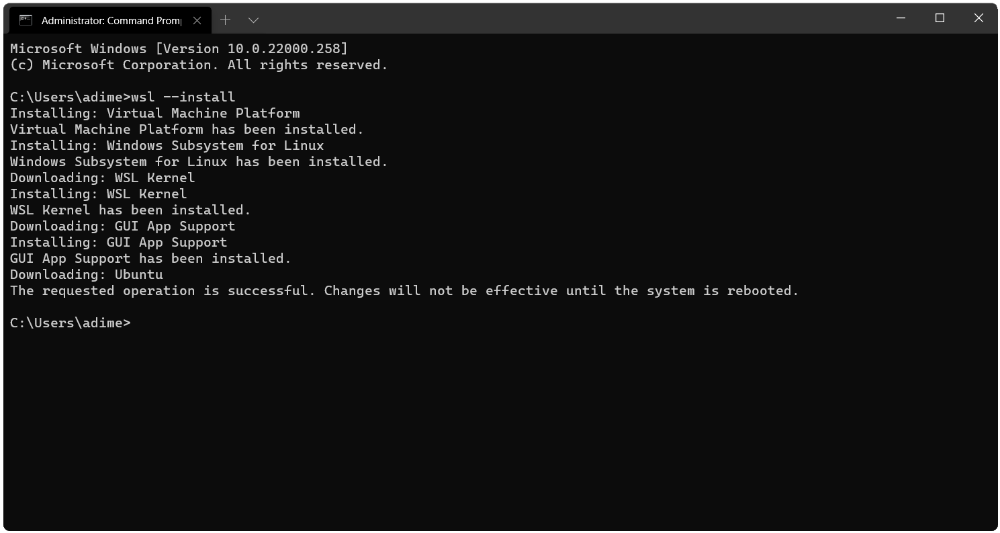
Next, type the following command into the prompt:
wsl --installThis should automatically download the required components and set-up your Linux environment. You will be required to restart Windows 11 when the installation is complete. Ubuntu is the default flavour of Linux that will be installed with this command.

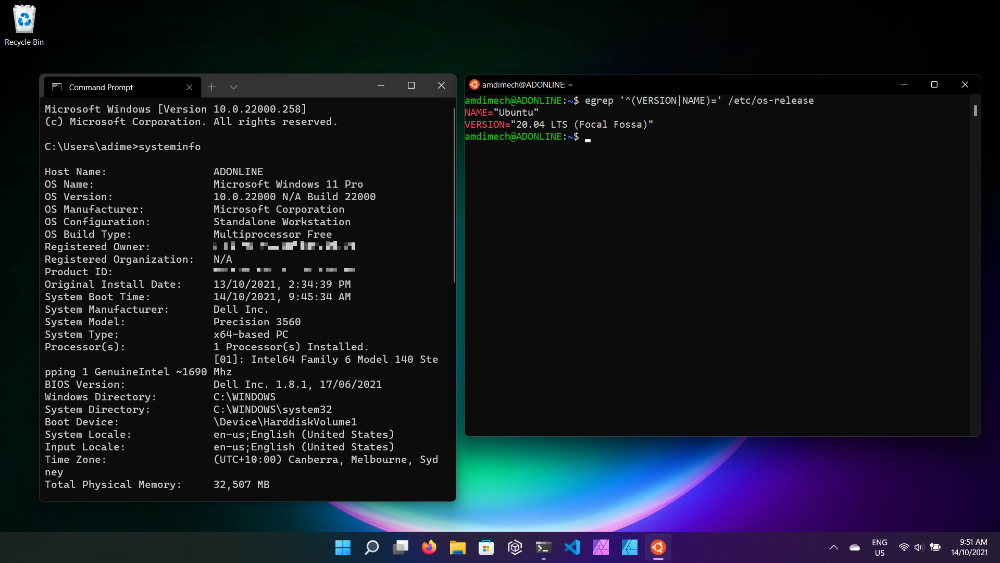
Once the restart is complete, you will be able to run Windows 11 and Linux side-by-side (within limits).
When you first run WSL, you’ll be asked to submit a username and password for Linux. These will be your Linux credentials and won’t affect any Windows settings.

If you want to run a different flavour of Linux, you can. These can be run side-by-side if desired.
To check which distributions are available in WSL, enter the following command into Windows Terminal:
wsl --list --onlineA list will be generated. At the time of writing, this included:
- Ubuntu
- Debian
- Kali Linux Rolling
- openSUSE Leap 42
- Linux Enterprise Server v12
- Ubuntu-16.04
- Ubuntu-18.04
- Ubuntu-20.04
To install one of these, enter the following command into Windows Terminal where <distro> is the distribution name:
wsl --install -d <Distro>
Comments
No comments have yet been submitted. Be the first!