Use a batch file to run your PowerShell scripts
This simple batch file will enable a PowerShell script file (*.ps1) to execute with Administrator permissions in Windows.
When preparing PowerShell code for others to use, it’s a lot easier to wrap it up as a PowerShell script file (*.ps1) and then execute it from a batch file (*.bat).
There are several good reasons for doing this:
- ‘Ordinary users’ are often confronted by PowerShell and baulk at using it (“it looks scary”).
- When a user double-clicks on a PowerShell script file (*.ps1) the default action is to open the file in Notepad (or similar) rather than executing it. This causes confusion (“it doesn’t work”).
- If the script relies on Administrator permissions to run properly, there is additional rigmarole for users to get this to work properly.
- Double-clicking on a file/icon is intuitive for 99% of the population.
I have a number of scripts which co-workers rely upon. Each script is saved as a *.ps1 file and activated via a *.bat file which in turn is linked-to on each users’ desktop via a shortcut (*.lnk). If I ever need to upgrade a script, I simply change the *.ps1 file and link to the new version using the *.bat. Because the desktop shortcuts for each user point to the *.bat, I never need to involve them when I update my work. Easy!
Some of my scripts require Administrator permissions to work. I have found the following batch file code to work well in activating PowerShell scripts with Administrator privileges:
PowerShell -NoProfile -ExecutionPolicy Bypass -Command "& {Start-Process PowerShell -ArgumentList '-NoProfile -ExecutionPolicy Bypass -File ""c:\path\to\file\script.ps1""' -Verb RunAs}"Simply change the file path to point to the *.ps1 file.
Keeping it simple for users
As previously stated, I create shortcuts that point to *.bat files so that users can then place these on their desktops for ease-of-use.
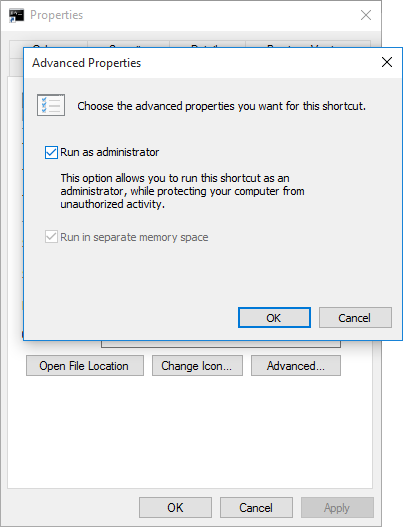
When first creating shortcuts, there is a requirement to right-click on the shortcut, select “Properties”, go to the Shortcut tab and then click “Advanced…” to choose the “Run as Administrator” option.

Once that’s done, it’s ready to roll.
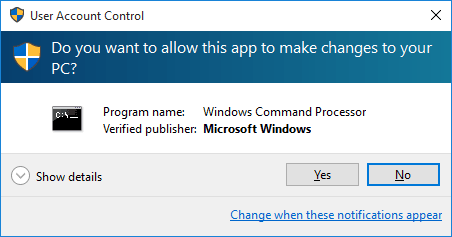
To run the script, a user just double-clicks on the shortcut. Microsoft Windows will still require users to respond to the User Account Control prompt, but the script will then execute seamlessly because the Batch file has instructed PowerShell to run with Administrator permissions.

And another thing…
Should it be desired to hide the PowerShell window whilst it runs, start the *.bat file with the following code:
PowerShell -WindowStyle Hidden -NoProfile....Note that the PowerShell window may still briefly appear when this code is used, but only momentarily.
Comments
7 responses to “Use a batch file to run your PowerShell scripts”
How we can pass argument from above batch file code?
lets say I have a -dbname parameter which i want to pass?
i tried like this?
PowerShell -NoProfile -ExecutionPolicy Bypass -Command “& {Start-Process PowerShell -ArgumentList ‘-NoProfile -ExecutionPolicy Bypass -File “”c:\path\to\file\script.ps1 -dbname mydatabasename “”‘ -Verb RunAs}”
Please someone answer to this!
This is a great post man! I cut & pasted it and it worked like a charm the first time! I was already searching for half a day and finally found your post.
Big tumbs up!
I echo what “the cycler” said. I hunted quite some time and finally ran across this; cut, paste, changed the script file path and …wa la! Worked like a charm. Thank you for sharing this.
Isn’t the first “-ExecutionPolicy Bypass” not necessary?
In the recent versions of powershell is sees if your script is made on this machine or not. If it is the latter case, it will object since by default all external scripts will be blocked. if you do not want to bypass this setting system wide you can better open a new powershell session with this argument which is only active for this session.
If you bypass this all scripts can run on your machine. Something not everyone wants to risk. Therefor the “-ExecutionPolicy Bypass” is a good thing to implement.